I'm so excited to share my
Laundry Shelf Makeover

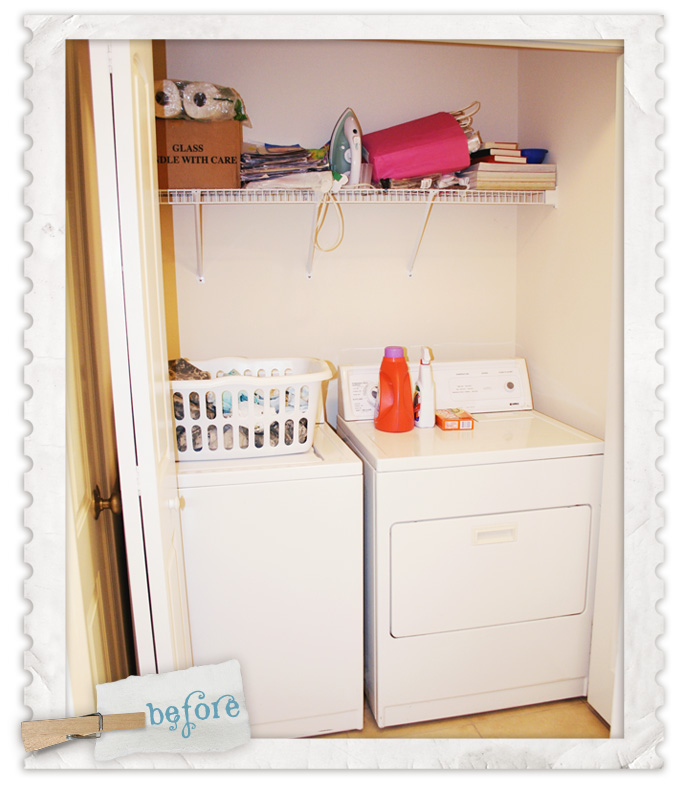
This has been in the works for awhile and I'm so happy to see it all done. It makes such a BIG difference in my tiny little space! I started with the standard {ugly} white wire shelf that is so common in laundry closets. It is installed way too high to be convenient...I couldn't do anything about that, but I was able to make it look a little more custom and charming!
Before:
So how did I do it?
{STEP 1}
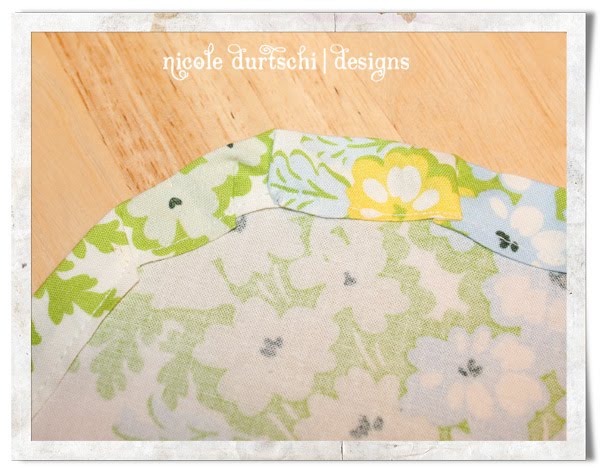
Remember the left over fabric I was so excited about from my Ironing Board Cover?
Well, I had just enough to make two panels. I simply did a small hem around all four sides, and then turned the top under about two inches to form a casing. I threaded the two panels on to a tension spring rod and placed it behind the wire shelf rim. I do wish I had a little more fabric left over so that the curtains would be fuller, but that is okay.

{STEP 2}
I took a trip to Home Depot and bought a standard cheapy piece of trim. That was an adventure in itself! You had to cut the trim yourself, and tools and I don't get along! When I took shop in Jr. High the teacher basically created all my projects for me so I couldn't use the power tools! So, I was in the aisle sawing away with all these guys watching me and not a single one asked if I wanted help! It took me at least 10 minutes to saw through that little board!
Anyway, when I got it home I applied 2 coats of paint (I bought trim that was already primed). I used Folk Art Vintage White Acrylic Paint. Then I used really watered down brown acrylic paint as a glaze to add some definition.

{STEP 3}
I didn't want a curtain to go all the way across the front. I've never really liked that look. I wanted something that looked more like I was peeking out of a window. It looked so plain when I got the panels up, though and I felt like I need more yellow in the space. So, I took a trip to Hobby Lobby and picked up some super cute Yellow Gingham Fabric and created a little valance. I hemmed both short sides and one long size. On the un-hemmed side I did a gathering stitch. If you don't sew, you could easily use a Heat and Bond product for your hem and just pleat the valance as you attach it to the trim.

{STEP 4}
Using my glue gun, I attached the gathered side of the valance to the back of my trim piece.

{STEP 5}
Then came the hard part-LOL! I thought it would be so easy to hang this up, but nothing I tried worked. We are renting, so this had to be fairly easy to remove without causing damage. I tried foam double stick tape, command velcro strips and even hot glue! Finally, I stapled three pieces of ribbon to the back {on both ends and the middle} and tied it to the shelf!

{STEP 6}
I then placed some of the foam double stick tape to the little end caps to keep the trim more stationary. It's been a week and it hasn't fallen off yet!
Woo Hoo!!!

The final result?
Fabulous!
I couldn't be happier with how it turned out. I was able to incorporate my favorite fabric print from Heather Bailey's Nicey Jane Collection into the room {since my ironing board won't fit in there} and disguise a hideous wire shelf! You can still see a couple of support brackets {that aren't centered and drive me nuts} but I'm hoping the cuteness of everything else will detract from those!
Here is the After:


I'm oh so close to being done! I just gotta get the shelf decorated on top now!
I'm taking a little day off from the laundry closet and hope to share another project I've been working on. It is purple and pink and scalloped and so totally girly! My daughter loves it and I can't wait to share it with you all! It just needs a few finishing touches.
Thanks for stopping by and have a fabulous day!

I linked my project to these great parties: