Showing posts with label Sewing. Show all posts

Preparing For Baby {Car Seat Canopy}

Hello! Nicole here!
I'm back after a little (8 month) unplanned break. I was busy creating something wonderfully cute and precious. It was exhausting work, but totally worth it in the end!
I'm so excited to introduce you to the newest ~and long awaited~ addition to our family. He arrived a month ago and has stolen our hearts.
~~William Jay~~

Although I didn't post on the blog, I was busy creating lots of baby things to prepare for the arrival of this sweet little man. Some things I created from scratch and others I used templates and patterns already provided by other fabulous bloggers. I took pictures along the way and I'm going to share it all! I will post as regularly as I can...or should I say as regularly as Will will let me!

{Car Seat Canopy}
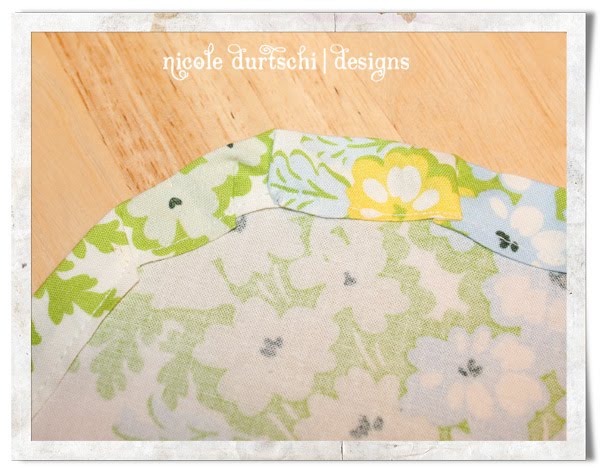
My first project was a carseat canopy. They didn't have these 7 years ago when I had my daughter and it was at the top of my baby list for our little man. It took me forevvver to decide on fabric...I mean like 7 months! Everything I liked was way too girly. Then I stumbled upon the Happier Collection by Riley Blake. It was instant love. It comes in several color ways, but here are the coordinates I used.
Then I had to decide on how I was going to do it. I wanted something fancy and unique and different! I found the Zippit Car Seat Canopy pattern on Etsy and ordered it right away. It was a little pricey, but exactly what I was looking for. Plus, she allows commercial use of her pattern without any other additional charges! It was fairly easy to follow, but there were a couple parts that were a little tricky.
I'm so proud of my finished project! I put in a zipper and used piping, velcro and snaps for the first time...and it all works how it is suppose to! 
One of the things that drew me to this particular cover, was the angled side corners. I love that it doesn't touch the ground and get dirty. It is a much more tailored and clean look.
It has a bustle in the back to allow for air flow. It just snaps in place...super easy!
What I love the most, though, is the zippered front.
It is awesome being able to adjust it depending on where we are and what we are doing.
Our little man loves it and instantly falls asleep as soon as he is buckled in.
I give this cover 2 thumbs up and would totally recommend to those wanting to make one! 

I will be back soon with my coordinating diaper bag and accessories.
Once I finally found a fabric I loved, I went a little crazy with it!

I joined these fun parties:


Candy Corn Cuteness

We had to attend a Fall Festival at my hubby's Battalion this weekend and there was going to be all kinds of fun and games. The kids were to wear their costumes, but since the Princess is going to be a Southern Belle (isn't that perfect for our first Halloween in the south!) I thought her costume would be to big and bothersome for her to play....plus I didn't want it to get ruined before pictures Halloween! So, after seeing several cute ideas in blog land, I created this for her. It was definitely a hit at the Festival and she loved it!
First, I created the Three Tiered Skirt using a fabulous tutorial I found at Kurky Ideas. The skirt itself was easy and took very little fabric, but I do hate gathering....and there was endless gathering on this skirt!
The endless gathering was worth it though, because every little girl loves a Twirly Skirt and this brought an instant smile to the Princess's face!
I was just going to pair this skirt with a solid colored T-Shirt, but then I saw this tutorial for a Candy Corn Applique at Positively Splendid and knew it would be a perfect match!
Here is a close up of all those ruffles! I couldn't believe I was willingly gathering and ruffling more after that skirt! But, I persevered and love the end result!
Then, I decided that she needed some matching hair bows. I've always wanted to make those fabulous Korker Bows...I have all the supplies, but have never actually made them. After doing a quick search, I used a tutorial that I found at the Ribbon Retreat. These were so fun, but totally addicting! I need to make more before she won't let me put bow in her hair anymore!
My plan was to have her wear some tights, but it was suppose to get up to 80 on Saturday. So, I grabbed a pair of her plain white socks, created another ruffle and sewed them on to the cuff. To cover up where the two ends meet, I attached a cute little bow.
I probably could have kept adding more, but at this point I made my self stop! She was so excited when she came downstairs in the morning to see her Candy Corn outfit. The good news is that after all this work, I think she may be able to wear it again next year because the skirt ended up a little longer than I was planning.

After the Festival, we went to the park to take some pictures of the Princess in her cute new outfit.
Thanks so much for stopping by and have a great day!
I joined these fun parties:

Owl Bags

It's time for Halloween crafts! I LOVE Halloween. I also love owls - and this project involves both. I made these owl trick-or-treat bags for my girls and they get so excited to use them to get their candy. I just enjoy looking at them!


I got the tutorial here. This was my first official sewing project last fall and I didn't think it was too hard to follow. Definitely much better than a pattern. Patterns are a foreign language to me! I'm all for picture tutorials instead.


Laundry Closet Makeover - Part 6

I'm so excited to share my
Laundry Shelf Makeover
This has been in the works for awhile and I'm so happy to see it all done. It makes such a BIG difference in my tiny little space! I started with the standard {ugly} white wire shelf that is so common in laundry closets. It is installed way too high to be convenient...I couldn't do anything about that, but I was able to make it look a little more custom and charming!
Before:

So how did I do it?

{STEP 1}
Remember the left over fabric I was so excited about from my Ironing Board Cover?
Well, I had just enough to make two panels. I simply did a small hem around all four sides, and then turned the top under about two inches to form a casing. I threaded the two panels on to a tension spring rod and placed it behind the wire shelf rim. I do wish I had a little more fabric left over so that the curtains would be fuller, but that is okay.

{STEP 2}
I took a trip to Home Depot and bought a standard cheapy piece of trim. That was an adventure in itself! You had to cut the trim yourself, and tools and I don't get along! When I took shop in Jr. High the teacher basically created all my projects for me so I couldn't use the power tools! So, I was in the aisle sawing away with all these guys watching me and not a single one asked if I wanted help! It took me at least 10 minutes to saw through that little board!

Anyway, when I got it home I applied 2 coats of paint (I bought trim that was already primed). I used Folk Art Vintage White Acrylic Paint. Then I used really watered down brown acrylic paint as a glaze to add some definition.
{STEP 3}
I didn't want a curtain to go all the way across the front. I've never really liked that look. I wanted something that looked more like I was peeking out of a window. It looked so plain when I got the panels up, though and I felt like I need more yellow in the space. So, I took a trip to Hobby Lobby and picked up some super cute Yellow Gingham Fabric and created a little valance. I hemmed both short sides and one long size. On the un-hemmed side I did a gathering stitch. If you don't sew, you could easily use a Heat and Bond product for your hem and just pleat the valance as you attach it to the trim.
 
{STEP 4}
Using my glue gun, I attached the gathered side of the valance to the back of my trim piece.
{STEP 5}
Then came the hard part-LOL! I thought it would be so easy to hang this up, but nothing I tried worked. We are renting, so this had to be fairly easy to remove without causing damage. I tried foam double stick tape, command velcro strips and even hot glue! Finally, I stapled three pieces of ribbon to the back {on both ends and the middle} and tied it to the shelf!
{STEP 6}
I then placed some of the foam double stick tape to the little end caps to keep the trim more stationary. It's been a week and it hasn't fallen off yet!
Woo Hoo!!!
 
The final result?
 Fabulous!
I couldn't be happier with how it turned out. I was able to incorporate my favorite fabric print from Heather Bailey's Nicey Jane Collection into the room {since my ironing board won't fit in there} and disguise a hideous wire shelf! You can still see a couple of support brackets {that aren't centered and drive me nuts} but I'm hoping the cuteness of everything else will detract from those!

Here is the After:


I'm oh so close to being done! I just gotta get the shelf decorated on top now!

I'm taking a little day off from the laundry closet and hope to share another project I've been working on. It is purple and pink and scalloped and so totally girly! My daughter loves it and I can't wait to share it with you all! It just needs a few finishing touches.

Thanks for stopping by and have a fabulous day!
I linked my project to these great parties:
Visit thecsiproject.com

Laundry Closet Makeover - Part 5

Hi everyone! Today I'm sharing the new Ironing Board Cover I made. I'm so in love with it!
But first, I wanted to Thank You all for your super duper sweet comment on my little laundry closet. They really make my day! I'm getting so close to the end and can't wait to reveal the whole room and how it has come together. Lots of you have asked if it makes doing laundry more fun.....and it totally does! Every time I open the doors it makes me smile. :0) My little closet is right off the kitchen and half the time I leave the bi-fold doors open just so I can see all the cuteness!

Secondly, I wanted to share my template with you for my "Clothesline Fresh" sign.
I know some of you have been patiently waiting for this and I thank you! It is done in pdf format so you will need Adobe Acrobat Reader to be able to open it. It is a free program and is very easy to download if you don't already have it. This is sized to fit a 27"x8" sign, but can easily be reduced or enlarged to fit your sign. Please know that there are three pages, so make sure you print them all and then tape them together to create one long piece. You can read the rest of the tutorial on how I created my sign HERE.
Click on the photo below and it will take you to my box.net account where you can download the file. Be sure let me know if you have any questions/comments!
I also had a question on the font. I used CK Society, but I looked it up and it is unfortunately no longer available.

Now, on to my
IRONING BOARD COVER!
If you missed my other laundry Room Projects, you can see them HERE.
This guy is what started my whole Laundry Closet decorating! I was just going to do the cover and then when I saw all the other yummy fabrics in the Nicey Jane Collection, I knew I had to do more! The funny thing is, my closet is so small my ironing board doesn't even fit {tears}. I was able to incorporate the fabric into the closet in another way, though. It is my favorite print and I had to get it in there some how! There are surprisingly few tutorials on how to make covers out there, so I decided to show you how I made mine!

{disclaimer: I'm sorry about the quality of the photos! My soldier has been gone training for 3 weeks and when I couldn't sleep one night I got up at midnight and started on this~LOL! Midnight = No Light = Not So Great Pictures}

{STEP 1}
Pick your fabric ~ You will need 2 yards. Make sure it is 100% cotton. Using a fabric that is blended or made with something other than cotton may melt when the iron is place on it. That would be sad after all the work you put in to creating it!
Remove the old cover off your ironing board and lay it flat on your fabric. I was so excited it only took one side of my fabric. I was able to put the other half to good use later on!

{STEP 2 &3}
I wanted my cover to be a little bit bigger than the original, so I a marked 2" all the way around the cover and cut it out. If you are happy with the size of your original cover, you can probably  just do 1". This will allow you to create a casing for your string.
This is what mine looked like when it was all cut out:
{STEP 4}
Now you need to create your casing so that you can cinch the cover closed. I folded the edge under 1/4" all the way around (to hide raw edge) and then folded again 3/4" and ironed and pinned in place.
{STEP 5 }
Sew close to the edge (I think I sewed about 1/4" from the edge). The curves can be tricky. I just pleated mine slightly. Remember it doesn't have to be perfect as you won't even see it.
Here is what mine looked like all sewn down:
{STEP 6 }
Remember to leave an opening between where you started and where you ended so that you can thread your sting through the casing. This is usually done on the square end of your board.
{STEP 7}
Next attach a safety pin to the end of your cord/string of choice. You may even be able to use the cord that came with the original cover. My soldier has a ton of parachute cord laying around, so that is what I used. Remember to melt the ends with a lighter if it is made of something that will fray. Thread your cord all the way through the casing and out the other end.
{STEP 8}
Place the padding back on your board and then fit your new cover over that. It is important to make sure you put the padding back on!
{STEP 9}
Pull cord tight and tie closed. Your fancy new ironing board is all ready to use!
I just adore how this turned out and I'm soooo very excited I got the pattern centered perfectly on my board! It is the perfect addition to my laundry room {even if it doesn't fit in there}!
Thanks so much for stopping by. Have a wonderful day!

I linked up to these fun parties!
Visit thecsiproject.com